| Title - $10.99 | |
 View |
Installation VNMRJ 1.1D/VNMRJ 2.1B on Sun Blade 1500 ( 9/21/07 ) (update 7/23/2008) #uname –a SUN OS snap-ii 5.8 Generic_108528-29 sun 4u sparc SUNW , Sun-Blade-1500 9/2/2008: attempt install Solaris 8 on to SUN Blade-150. Notes: on Green If Solaris 8 is already installed on this machine. Re-install it. Re-install everything: SUN OS 8 and SUN patches and VNMRJ 1.1D and Patches for Mercury plus or Vx (1.1DallSOLmpl1006.tar.Z)------ to work with Mercury 300. Login as root: #/usr/sbin/psrinfo –v check the speed of processor and version. The SparcV9 processor operates at 650Mhz. has a SparcV9 floating point processor. #shutdown –y –g0 –i0 or stop A; or power down/up then press stop A Come down to ok prompt. Insert CD “Solaris 8 software 2/04 1 of 2 Part # 705-0852-10” (We have this one)
Note: SOLARIS 8 SOFTWARE 2/02 or older version ---- will not work on Blade 1500. Error message: Boot: can not open kernel /sparcv9/unix: Enter file name /kernel/sparcv9/unix: Problem: For SUN Blade 1500 should use Solaris HW 5/03 or later version. The above 2/02 will not work. Change to a newer version of Solaris 8 5/03 or, 2/04. #### For Blade 150, install Solaris 8 2/04, Error message: Connection refused (error 146) unable to connect to X server. You have to install the Mouse, otherwise , you will have above error message. Ok> printenv or help to display some information of SUN computer settings. OK>Setenv auto-boot false OK> help
Ok> boot cdrom
The screen will go blank then loading some files, stopped 1024 Mb installed . . Loading /platform/SUNW, Sun-blade-1500-s/ufsboot Loading /plateform/sun4u/ufsboot SunOS release 5.8 version Generic 108528-29 64 bit .After boot up on CD, There are two questions for the language selection:
DHCP ---- ( Dynamic Host Configuration Protocol (DHCP) is a network protocol that enables a DHCP server to automatically assign an IP address to an individual computer's TCP/IP stack software. DHCP assigns a number dynamically from a defined range of numbers (i.e., a scope) configured for a given network. Client computers configured to use DHCP for IP assignment do not need to have a statically assigned IP address. In addition, they generally do not need to have addresses configured for DNS servers or WINS servers, as these are also set by the DHCP server.
/ 1000mb swap (double the ram) 2mb /var 24 /opt 50 /usr 50 /export/home rest of the disk space available detailed see the menual from Ken
Insert VNMRJ 1.1D June 21, 2004 Part number: 01-907388-03
If you system is a spectrometer:
On all other systems:
1.1DpsgSOLmvx905 (released 2006-01-20). This one is required for the system with ProTune accessory. We do not have it! Note: I installed as Mercury Plus, since there is not VNRMJ VX selection on the VNMRJ 1.1D installation CD. There are only INOVA and Mercury Plus. It works on Mercury Vx console with the patche 1.1DallSOLmpl106.tar.Z.
^^^^^^^^^^^^^^^^^^^^^^^^^^ 7/23/2008
Install VNMRJ 1.1D for Mercury 300 (Radiology Mercury 300) on Sun Blade 150 #uname –a SUN OS wu-hp 5.8 Generic_108528-29 sun 4u sparc SUNW , Sun-Blade-100
The SUN OS has been installed properly. Install SUN patches.
$$$$$$$$$$$$$$$$$$$$$$$$$$$$$$$$$$$$$$$$$$$$$$$ Additional Reading: Additional Patche information on VNMRJ 1.1D/SUN solaris/Mercury Vx CHECKSUM Validation for Patch File "1.1DallSOLmvx106.tar.Z": ---------------------------------------------------------------------- 1. After downloading the patch file "1.1DallSOLmvx106.tar.Z" and storing it on your Sun workstation, DON'T uncompress and/or extract it, but run the following command PRIOR TO installing the patch: cksum 1.1DallSOLmvx106.tar.Z you should see an output line 2354741764 7657791 1.1DallSOLmvx106.tar.Z where the first number is the checksum for the file, and the second number is the size of the file in bytes. IF EITHER OF THESE TWO VALUES DIFFER FROM THE OUTPUT SHOWN ABOVE, DON'T PROCEED WITH THE INSTALLATION, BUT DOWNLOAD THE PATCH FILE AGAIN, PREFERABLY WITH AN ALTERNATIVE METHOD, then reevaluate the checksum! Login as VNMR1 to patchinstall There are two version of Mercury system---Vx and Plus. On our VNMRJ 1.1D CD there is only for Mercury Plus. So you have to install the patche for Mercury Plus, otherwise a error message: this patch is not suitable for this kind of console. 1.1DallSOLmvx106.tar.Z--- for Mercury VX console 1.1DallSOLmpl106.tar.Z -----Mercury Plus console If both numbers are correct you can install the patch, from the directory where the patch is stored, using /vnmr/bin/patchinstall 1.1DallSOLmvx106.tar.Z ####################################################################### Patch 1.1DallSOLmvx106.tar.Z fully contains 1.1DallSOLmvx105.tar.Z, i.e., you do not need to install any earlier patches prior to this one - on the other hand, if patch 1.1DallSOLmvx105.tar.Z is installed the new one can be installed on top of the earlier ones. Patch 1.1DallSOLmvx106.tar.Z fixes one additional bug: After installing VnmrJ 1.1D data may be lost from "~vnmrsys/data/studies", when "Clear Study" from the "Study Options" menu in the StudyQ is selected for the first time in VnmrJ 1.1D. This happens the first time only. Therefore it is not the installation of the software, nor the "makeuser" script, nor the patch installation that deletes the data in "~/vnmrsys/data/studies". See also bug "data_loss.j1101". Therefore we urge you to BACK UP YOUR DATA BEFORE INSTALLING VnmrJ 1.1D, particularly "~vnmrsys/data/studies" for ALL users. You must install patch 1.1DallSOLmvx106 or later before running VnmrJ as any user. ----------------------------------------------------------------------- This patch 1.1DallSOLmvx105.tar.Z fixes a certain number of bugs for the VnmrJ 1.1D release. Patch 102, 103, and 104 were internal patches only. Patch 1.1DallSOLmvx105.tar.Z fully contains the 1.1DallSOLmvx101.tar.Z patch. This patch contains a fix to the walkup macro (see bug "nightq.j1101" below). It is recommended that you check your crontab if you used automation with the night queue, to remove crontab entries for the nightQ. See 'man crontab' for details. The additional bugs fixed are: aipdeleterois.d1101 Doesn't delete all ROIs annotations.d1101 Preview shows frames annotations.d1110 Menu in editor gives incorrect suggestion ("$vi") annotations.d1114 Orientation annotation seem to be wrong for coronals fixpar.j1105 Does not set "dgroup" for "ref1" properly ghmqctoxy.j1101 Macro aborts because it cannot retrieve "twpr_cf" image_display.d1104 No way to sort on slice order image_display.d1105 "aipWindowSplit" index error layout.d1104 "Auto" sometimes goofy (improved) locator.d1118 "rfcoil" not recognized nightq.j1101 Walkup nightQ may start twice panels.d1107 Wrong if parameter doesn't exist proton.d1103 Incorrect default values in parameter set protocols.d1107 "Create new protocol" may have bad parameter protocols.d1108 Doesn't deal well with spaces pulsetool.d1101 Will not start with VnmrJ running qtune.j1104 "qtune" shows just a noisy line at the bottom recon.d1103 Problems when installing patch 1.bDallSOLall102 recon.d1104 Some gems images are split when arraying slices recon_all.d1109 Doesn't work with "fract_ky" for multi-slice/shot rf_coil.d1102 User has to change RF coil after loading new scan save_data_setup.j1101 Displays wrong path for saved data studyq.d1105 Error "sqval[0]: index out of bounds" studyq.d1117 comments on nodes in SQ don't match comment in data vnmrj.d1109 Accelerator keys "g[n]" and "[n]f" not working fsems tep not shown in panel power and gss may get calculated incorrectly because of a limitation in imprep (pi,pipat disabled; ir not allowed) pulse patten not checked fse3d show profile sets nv, nv2 to zero. tep not implemented waveform timings not taken into account in the sequence crusher pulses not used in sequence prescan cannot write to pulsecal file prescan_power cannot acquire a profile print images printing images in landscape mode printing to other then default printer semsdw diffusion scheme may not be displayed (diffscheme parameter created) This patch 1.1DallSOLmvx101.tar.Z is fixes a certain number of bugs for the VnmrJ 1.1D release. Some have been reported as bugs, others are improvements over existing features. This patch contains fixes to password protected files for the "Imaging_Sequences" option. After loading the patch, to load type: /vnmr/bin/load.pwd passwd Imaging_Sequences.pwd where "passwd" is the same as when loading VnmrJ 1.1D imaging.d1106 "Copy image" always copies into next available imaging.d1107 "Delete image" should update ReviewQ imaging.d1112 "sort by slice" fails when frames are not "1-(n)" imaging.d1108 The button "Delete Selected" should update ReviewQ layout.d1107 Menu doesn't change frame layout layout.d1108 Menu can only sort group by scan layout.d1109 ### In saving, name of layout shouldn't be entry field parameter_popup.d1101 Too wide plan.d1114 "Plan" button changes plan recon_all.d1109 Doesn't work with "fract_ky" for multi-slice/shot recon_all.d1111 Problem with arrayed "fsems" data with zero-filling recon_all.d1112 Header info wrong for arrayed experiments review_queue.d1108 String/real conflict when loading review_queue.d1107 ### "frames" should always be showing roi.d1113 No "displayed" option in the Current viewport vnmrj.d1110 Using "Delete" key causes core dump procproc Fixes a core dump setparams write format refers to $s instead of %s vwacq Under some circomstances an 18 element array would not complete, 17 an 19 were ok. This fix also improves downloading time for waveforms. vwauto occasionally get "MSR not booted" msg vnmrj.jar Vnmrbg Vnmr Under Imaging planning would slow down ft and ft2d now set procdim, even in background AT300 small bug fix SQ Comments comments on nodes in SQ don't match comment in data Additiona Reading:Solaris Patches: VNMRJ ----Solaris Patches for Solaris 7,8,9 with VNMRJ 1.1D June 21, 2004 Part No. 01-910699-03 #cd cdrom/cdrom0 #./load.patches it will start to install the patches on the CD.
Before you install VnmrJ, there are Solaris patches that are necessary for proper VnmrJ and VNMR operation. For example, Solaris patch 108940-24 handles core dumps. In Solaris 9 patch 111649-03 (which is not supplied with VnmrJ) might be needed for the firmware for the Toshiba SD-M1401 DVD-ROM drive. We recommend that you load patches now. Patches are on the VnmrJ Solaris Patches CD-ROM. Make sure that your system has the latest Solaris patches. In the patch number, the two digits after the dash are the patch version number. Each patch has a README file that provides specific information about the patch. For the latest information about Solaris patches, visit the SunSolve Online Web site: http://sunsolve.sun.com You can also check the Sun patch FTP server: ftp://sunsolve.sun.com/pub/patches/ Or you can visit the Varian NMR User Page at http:/www.varianinc.com . Click on NMR in the list of Scientific Instruments, then click on User Page in the Quick Links section. Preparing for Patch Installation Before you begin installing patches, make sure the following conditions are true: Chapter 3. Solaris Patch Installation and Error Messages 38 Solaris Installation and Administration 01-999270-00 A0604 • You are logged in as single user ( boot -s ). • VnmrJ is not running. • No users are logged on to your system (use the who command to verify this condition). • The NMR console is idle. If you are not sure which version of Solaris you are using, enter the command showrev . If the command shows SunOS 5.8 , your system is running Solaris 8; similarly, SunOS 5.7 is Solaris 7. Even within a given Solaris release, there can be newer versions that automatically include and install many patches, including those required by VnmrJ. To check whether a particular patch (for example, 108940-24) is already installed, use the following command (no output means that the patch is not installed): showrev -p | grep 108940-24 In addition to individual patches, Sun also offers entire clusters of recommended patches, such as 2.8_Recommended.tar.Z (typically files of 20 to 30 MB after compression), that permit bringing your Solaris installation to the latest level. Note, however, that the installation of patch clusters requires extra disk space. If don’t have at least 36 MB of free space in /var ( /var/sadm ), you can handle this problem four ways: • Install patches one by one using the patchadd command. • Use the -B option while invoking patchadd . This option directs patchadd to save the backout data to the user-specified file system. • Generate additional disk space by deleting files that are not needed. • Override the saving of the old files by using the -d (do not save) option when running patchadd . This method eliminates the possibility of restoring files to previous versions. Also see the manual page for the patchadd command: man patchadd Installation of a Solaris patch cluster takes one to two hours. Installing Solaris Patches To install Solaris patches, do the following: 1. Enter su to become root. 2. Enter init 0 . 3. Enter boot -s in order to boot up in the single user mode. 4. Enter the following: # ps -ef | grep vold If no results are shown , ?????: # /etc/init.d/volmgt start 5. Insert patch CD, and enter the following in a terminal window: # cd /cdrom/cdrom0 # ./load.patches 6. You are asked to confirm the installation of patches. Type y to install all patches or n to skip patch installation. If you select y , the appropriate patches for Solaris are installed. 3.2 Error Messages 01-999270-00 A0604 Solaris Installation and Administration 39 7. Eject the CD and reboot the computer: # eject cdrom # reboot
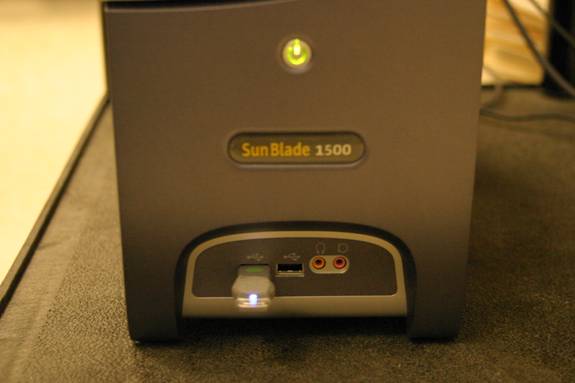
Mount USB Flash Drive on Sun Blade 1500
It will take about 10 seconds. The light on the USB Flash Drive (USBFD) will be on.
#cd /var/adm #more messages at the bottom of the message there are few lines as following: p-ii genunix: [ID 408114 kern.info] /pci@1e,600000/usb@a/storage@1 (scsa2usb0) offline
Jul 20 15:14:53 snap-ii usba: [ID 855233 kern.info] USB-device: storage@1, scsa2usb0 at bus address 2
Jul 20 15:14:53 snap-ii usba: [ID 349649 kern.info] Memorex, Mini TravelDrive, 0A006461326059A5
Jul 20 15:14:53 snap-ii genunix: [ID 936769 kern.info] scsa2usb0 is /pci@1e,600000/usb@a/storage@1
Jul 20 15:14:53 snap-ii genunix: [ID 408114 kern.info] /pci@1e,600000/usb@a/storage@1 (scsa2usb0) online
Jul 20 15:14:55 snap-ii scsi: [ID 193665 kern.info] usb_sd0 at scsa2usb0: target 0 lun 0
Jul 20 15:14:55 snap-ii genunix: [ID 936769 kern.info] usb_sd0 is /pci@1e,600000/usb@a/storage@1/disk@0,0
Jul 20 15:14:55 snap-ii genunix: [ID 408114 kern.info] /pci@1e,600000/usb@a/storage@1/disk@0,0 (usb_sd0) onli ne
Jul 20 15:14:55 snap-ii scsi: [ID 193665 kern.info] usb_sd1 at scsa2usb0: target 0 lun 1
Jul 20 15:14:55 snap-ii genunix: [ID 936769 kern.info] usb_sd1 is /pci@1e,600000/usb@a/storage@1/disk@0,1
Jul 20 15:14:55 snap-ii genunix: [ID 408114 kern.info] /pci@1e,600000/usb@a/storage@1/disk@0,1 (usb_sd1) onli Ne
It tells you the USBFD is properly inserted, otherwise the USBFD is not compable for the SUN station.
#cd /dev/dsk #ls The following lines will be displayed:
lrwxrwxrwx 1 root root 42 Nov 11 2005 c0t2d0s5 -> ../../devices/pci@1e,600000/ide@d/sd@2,0:f
lrwxrwxrwx 1 root root 42 Nov 11 2005 c0t2d0s6 -> ../../devices/pci@1e,600000/ide@d/sd@2,0:g
lrwxrwxrwx 1 root root 42 Nov 11 2005 c0t2d0s7 -> ../../devices/pci@1e,600000/ide@d/sd@2,0:h
lrwxrwxrwx 1 root root 54 Jul 20 14:24 c1t0d0s0 -> ../../devices/pci@1e,600000/usb@a/storage@1/disk@0,0:a
lrwxrwxrwx 1 root root 54 Jul 20 14:24 c1t0d0s1 -> ../../devices/pci@1e,600000/usb@a/storage@1/disk@0,0:b
lrwxrwxrwx 1 root root 54 Jul 20 14:24 c1t0d0s2 -> ../../devices/pci@1e,600000/usb@a/storage@1/disk@0,0:c
lrwxrwxrwx 1 root root 54 Jul 20 14:24 c1t0d0s3 -> ../../devices/pci@1e,600000/usb@a/storage@1/disk@0,0:d
Note: if the USBFD is not plug in, then there is no c1t0d0s0 etc. there is only c0t0d0s0 etc.
# mount -Fpcfs /dev/dsk/c1t0d0s0:c /mnt ---note: there is a space between :c and /mnt. It will take 20 seconds to show up the # prompt again, indicate mounting completed. To access the files in the USBFD: #cd /mnt # ls (01)~1.MP3 -(02)~2.MP3 -(03)~3.MP3 -(05)~1.MP3 -(06)~2.MP3 To copy files from SUN to the USBFD: #cp –r file_dir /mnt
#cd / - make sure you are not in the directory of /mnt otherwise: It will say the device is busy! # umount /mnt umount: /mnt busy
# umount /mnt # It should come back with prompt #, then you could unplug the USBFD.
Only ROOT can mount/umount the USBFD. Normal users (including vnmr1) can not mount/umount the USBFD.
This method is also works for some 60G USB external disks. Checked ----- (Western Digital 40G and 60G) It takes few minutes to mount on. Be patient.
|